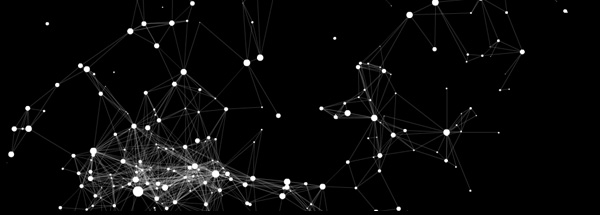
A natural expansion of the basic Node definition is the addition of a third dimension. There are many ways to achieve an illusion of three dimensions within a two dimensional surface, namely, the computer screen. The movement of the node is easily changed. We need only duplicate a set of transforming equations and change the variable names. The method outlined here is not a true three dimensional perspective, but it's convincing, easy to implement, and doesn't require too many additional resources. First, we'll take care of the node's movement by adding variables z and vz to their respective transforming equations. |
||
| Accelerate the Node through three dimensions
with friction |
||
// calculate acceleration relative to destination var fx=(this.dx-this._x)/50; var fy=(this.dy-this._y)/50; var fz=(this.dz-this.z)/50; // accelerate towards destination this.vx+=fx; this.vy+=fy; this.vz+=fz; // apply inertia this._x+=this.vx; this._y+=this.vy; this.z+=this.vz; // apply friction this.vx*=.7; this.vy*=.7; this.vz*=.7; |
||
Now to make the dimensionality of the node convincing, we need to do two things: stack the nodes within the layers and scale the nodes relative to their depth. Stacking the nodes can be brutal. In the Flash environment, each layer is allowed only one object. Objects in higher number layers are shown on top. Placing an object on a layer destroys anything that might have been there before. Instead, we would like to have nodes to be able to exist simultaneously at the same depth without clobbering each other. The solution is to track which layers have objects, and space out the mapping of depths to layers by a factor of about 10. That is, for each integer depth, there are 10 layers available for object placement. This system will work only if we constrain values of z (the depth) to a reasonable, positive range (say 0 to 100). We'll keep an array, filled initially with all zeros, to indicate which layers have objects placed within them. |
||
| The nodeList array keeps track of what layers contain a Node | ||
maxNodes=1000;
nodeList=new Array();
// set up depth ordering index
depthList = new Array(maxNodes);
for (n=0;n < int(maxNodes+maxNodes/100);n++) {
	depthList[n]=0;
}
|
||
We'll also use a function that automatically searches for the best available depth and returns the layer in which to place the next node. |
||
| Function getNextAvailableDepth finds the best empty layer for a new Node | ||
function getNextAvailableDepth(z) {
	// calculate best fit layer
	var zd=Math.round(z * Math.floor(maxnodes/100));
	while (depthList[zd]!=0) {
		zd++;
		if (zd > (maxnodes+maxnodes/100)) {
			trace("warning: no more layers!");
			return null;
		}
	}
	// a position has been found at zd
	// mark the position as taken
	depthList[zd]=1;
	// return the depth
	return (1+maxnodes-zd);
}
|
||
|
Now each time we create a node, we'll know exactly where to place
it by the return value of the function above. Note that the function
may return null in the case that there are no available functions
for the depth requested. |
||
| A Node's size is scaled according to its depth | ||
// some actionscript for scaling the node body by z |
||
| There are a few restrictions and disadvantages to this depth ordering system. Once created, nodes can not alter their z values. There is no vanishing point, so objects are not accurately rendered in 3D. Concurrent depths still have a first come, first serve layer ordering system. | ||
The swapDepth command is a perfectly good alternative to this approach. However, certain situations cause objects to get stuck in swapping loops, where no object is ever quite happy with where it is. This CPU intensive paradox is the reason it has not been used for this particular implementation. |
||
Our three dimensional node is now completely prototyped. As a final step in bringing these objects, we will develop a method to create them. Ideally, we would like something simple and reusable. |
||
| The createNode function provides a simple and reusable method in which to instantiate new nodes. | ||
function createNode(ix,iy,iz,dx,dy,dz) {
	var neo="nd"+String(depth++);
	var actualdepth=_root.getNextAvailableDepth(dz);
	this.attachMovie("node",neo,actualdepth);
	this[neo]._x=ix;
	this[neo]._y=iy;
	this[neo].z=iz;
	this[neo].dx=dx;
	this[neo].dy=dy;
	this[neo].dz=dz;

	return neo;
}
|
||
Note that creating a new node requires two sets of three parameters. These parameters are all numbers. The return value of the createNode function is the name of the node that was created. This name is added to the end of nodeList, an array that tracks the names of all nodes created. |
||
| A node is simultaneously created and added to the list of nodes. | ||
ix=random(800); // initial horizontal position iy=random(450); // initial vertical position iz=random(100); // initial depth dx=_xmouse; // destination position dy=_ymouse; // destination posittion dz=iz; // destination depth // create node and add to list of nodes nodeList.push(createNode(ix,iy,iz,dx,dy,dz)); |
||
More information on the node and it's variations can be found within the Life of the Node series of Levitated Expansions. |
||
| jtarbell, July 2002 | ||